Our purpose in this article is to prepare our own project template on Xcode as…

Upgrading the Swift 2 Project to Swift 4
Hi,
The history of the Swift programming language is not very historical. However, it is a modern programming language that is constantly updated and self-improved. As a person who writes languages such as Java, PHP, and Dart, Swift is really a smooth and fluent programming language. it is true that I enjoy coding this language 🙂
Another problem for the developers of iOS programming language is the application update. Especially the transition from Swift 2 project can be hard. Here I will share the simple steps you can use for this process.
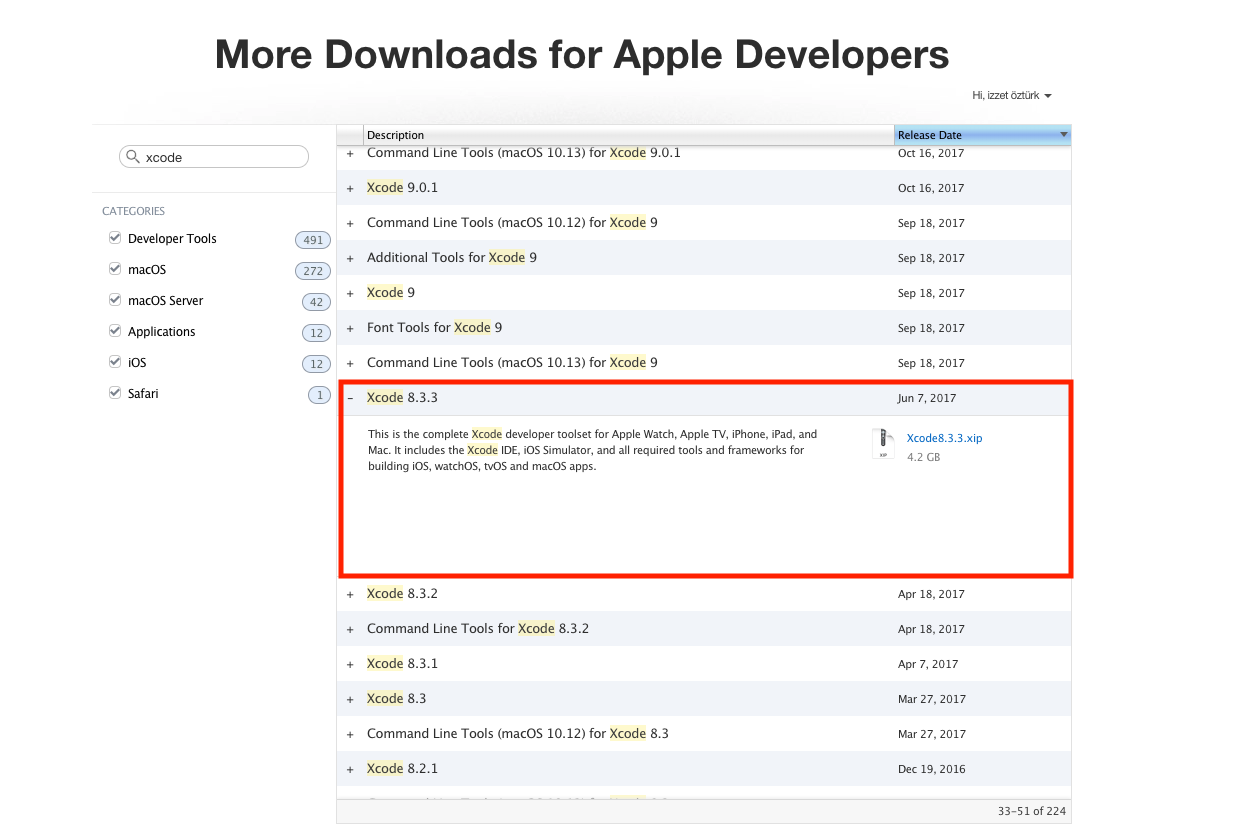
First of all, we will need to download Xcode 8, because Xcode 9 does not support by Swift 2 version. You can download it from the following address. I will download Xcode 8.3.3 and continue my process. https://developer.apple.com/download/more/
Then, we have to open our application with the Xcode that we have downloaded and we will have to convert it to Swift 3 version first. If we jump directly into the Swift 4 version in the Swift 2 version, this will cause a lot of incorrect processing for us. If we go step by step we will solve all our work Xcode.
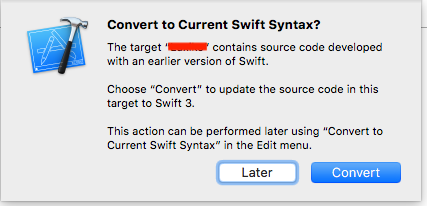
When we open our application with Xcode 8.3.3, we will automatically receive an alert as follows. (Edit> Convert> To Current Swift Syntax) If you open the same project in Xcode 9 and later versions, you will not see this process. I’m converting my project into a Swift 3 project by saying Convert.
Then, I open the project with the current Xcode (Xcode 10). If you do not see such a warning, you can also open the same screen under Edit> Convert> To Current Swift Syntax. From this
The important point to consider in the Convert process is to destroy the

The important point to consider in the Convert process is to destroy the errors caused by libraries if you are using Cocopods. Here, according to the Swift version, libraries give errors. You should update them and perform the Convert operation. During the Convert process, a checklist that contains libraries will appear. In this process, you must select and continue the project without selecting the libraries.

NOTE: In the case of code changes or errors when converting the project, Xcode will give us all the options in the red box. You can solve them one by one, instead of using Editor> Fix All in Scope (Control + Option + Cmd + F).
We have successfully updated our project. During the update, errors will occur due to the code that is written on the swift side, not the general one. Let it be easy to solve them in a logical way.
Related Posts

Comments (0)